After a big adventure, there is nothing like a toasty campfire to end the day. And there is also nothing more frustrating than struggling to light a campfire. Have no fear, here is how to start a campfire in (almost) any situation.
Supplies
- Tinder, kindling, firewood
- Something to light the fire (e.g., lighter, matches, ferro rod, etc.)
- Optional: axe
Most importantly: MAKE SURE YOU HAVE WATER TO PUT THE FIRE OUT!!
Step 1: prep work
First, you need to find a location and supplies for your campfire.
There is no good spot to have a campfire during a fire ban. Fire bans are issued when the risk of wildfire damage is high. Usually this is because of hot and dry conditions, but sometimes a community might issue a fire ban when they know they don’t currently have the resources to fight a fire (e.g., their firefighters are busy dealing with a different forest fire). Fire bans protect the environment — don’t have a fire during a fire ban. Be sure to check if there are any local restrictions beforehand.
Pick a spot where the ground is level, that isn’t below low-hanging branches, and is far away enough from bushes and tall grasses. If the fire gets larger than you expect or you’re hit with a surprise gust of wind, that fire could ignite the vegetation around you. Windy conditions and campfires are a dangerous combination — even when the fire is clear of surrounding vegetation, wind can still blow embers out of your fire.
Clear the area of flammable debris like sticks or twigs (you can use this stuff later for your fire). You want the campfire to have at least 3 metres of clearance in all directions. Scrape away the top layer of vegetation so that you expose the bare ground. You can create a makeshift fire ring by stacking rocks to form a circle with a metre diameter.
Collect your materials:
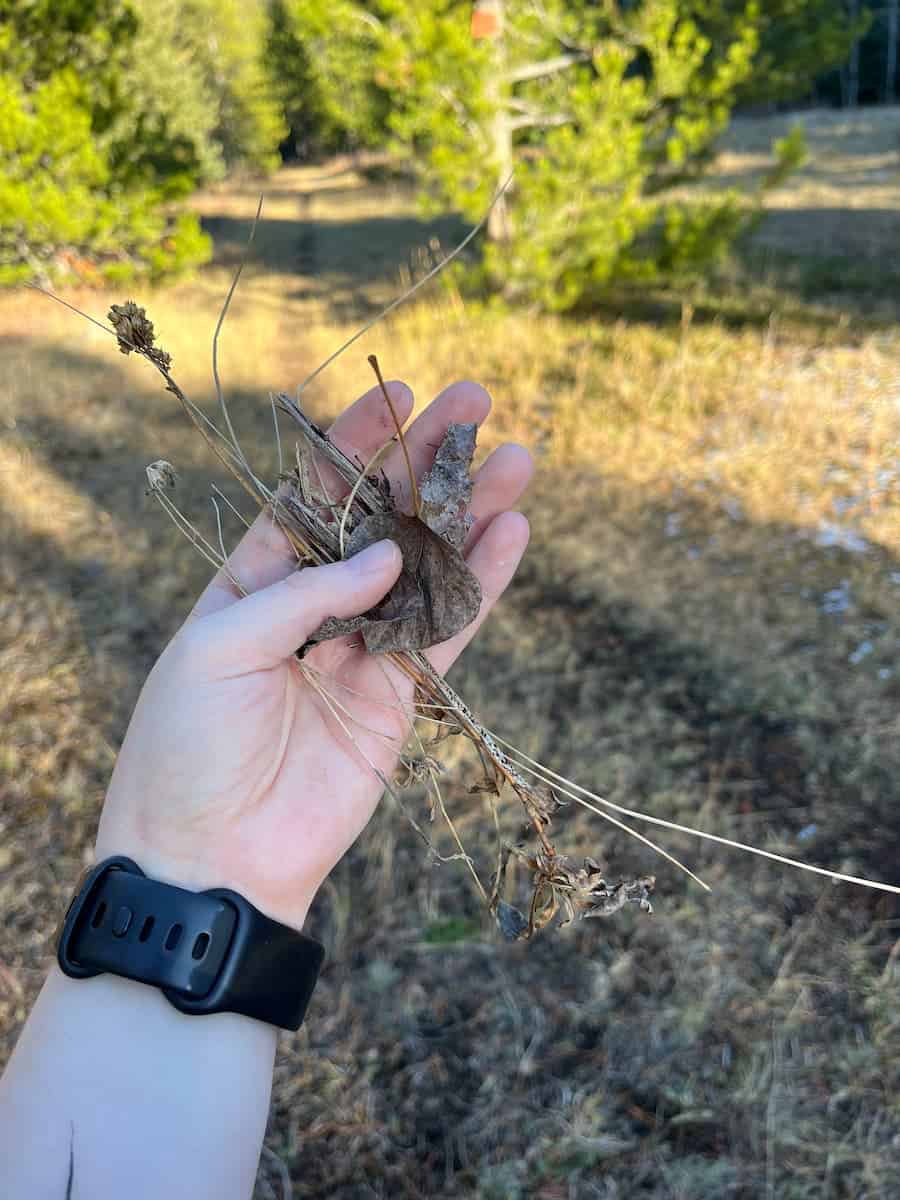
- Tinder. Tinder is small pieces of really dry, really combustible material. Dry leaves or bark, newspaper, and dryer lint all make good tinder. Your spark is going to ignite this stuff first.
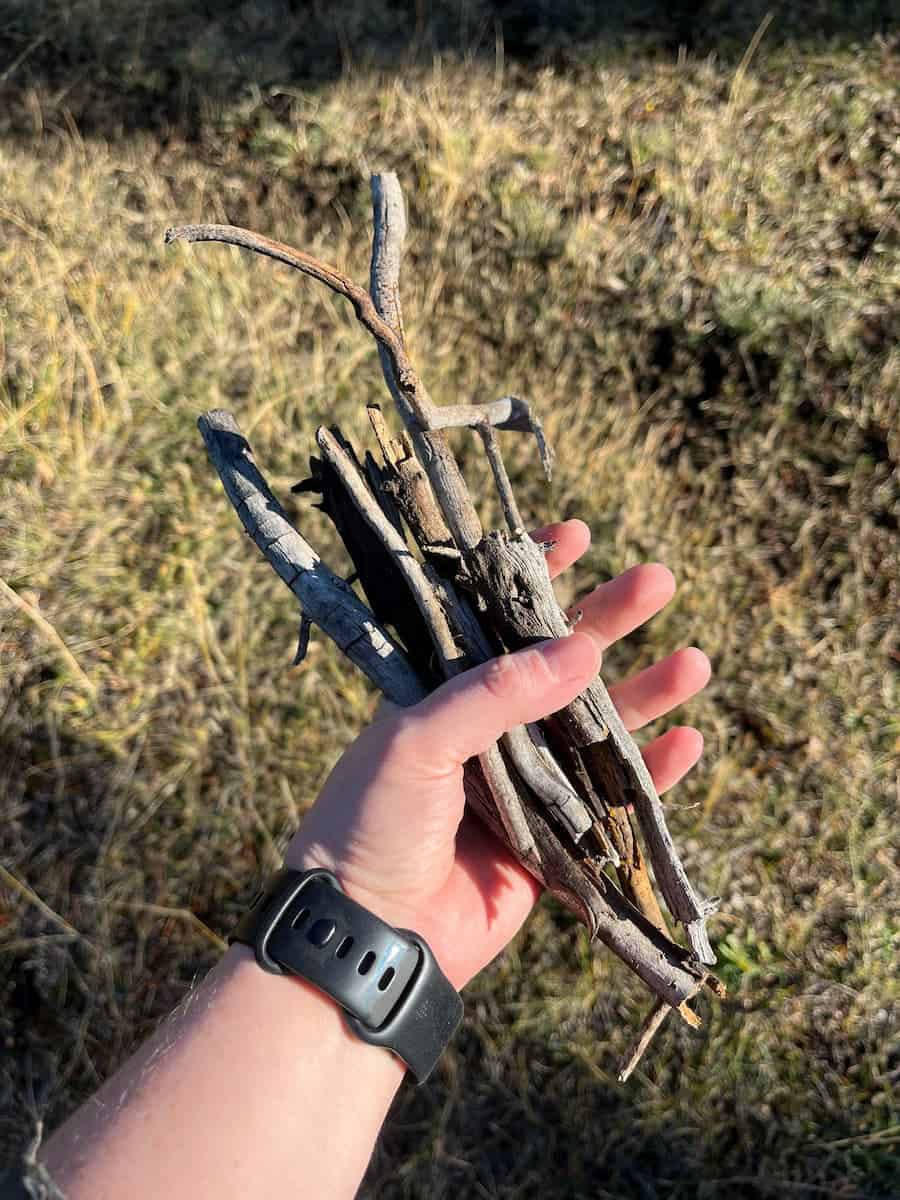
- Kindling. Once your tinder is lit, you’ll use it to light your kindling. Kindling is just small sticks and twigs. You need tinder to get the kindling going, and the kindling to get your firewood burning. It’s a little fire-making domino effect — each layer helps the next one catch.
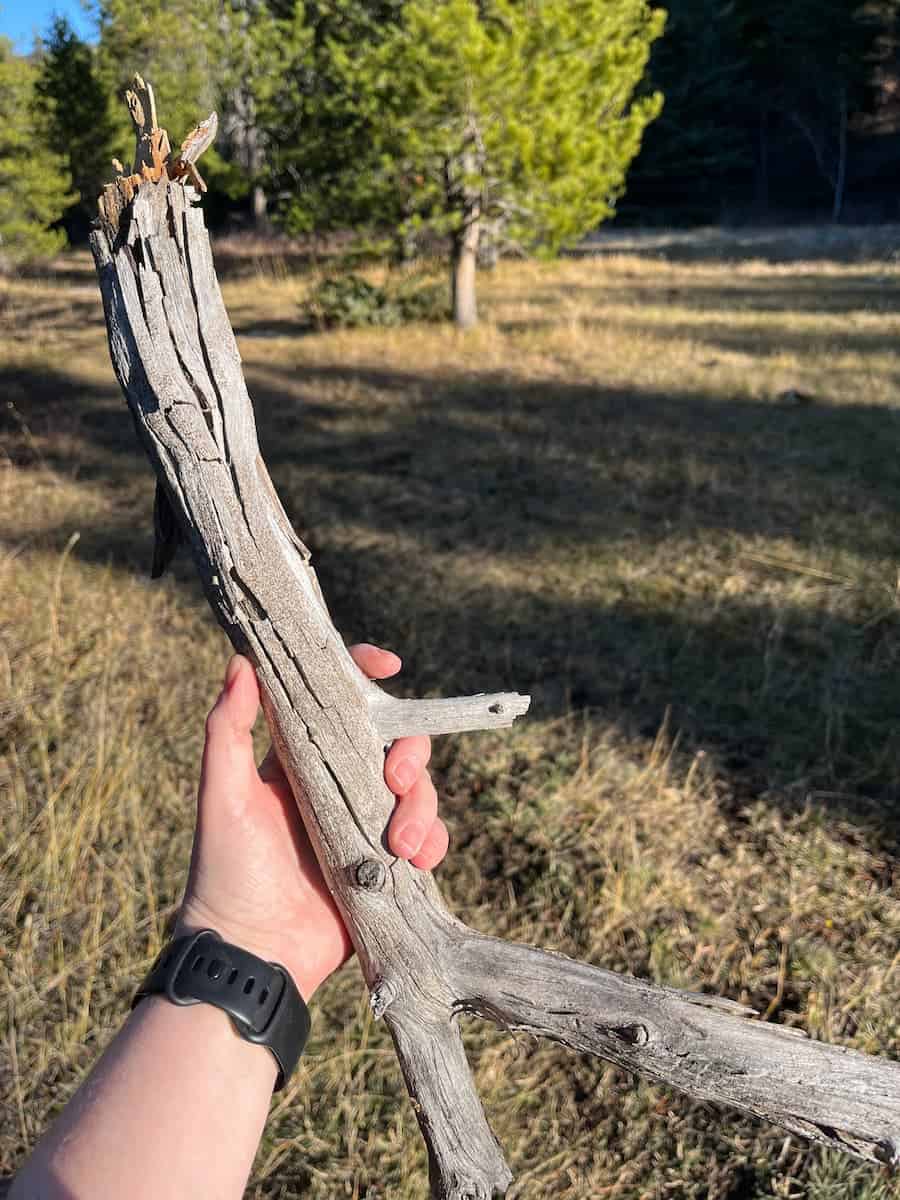
- Firewood. You want to chop your firewood so that it is small enough to catch on fire but large enough to stay burning for a while. A variety of sizes is nice, so that you can add larger logs as the fire gets stronger. Larger logs are going to require a stronger flame.
Notes from the Field Lab: Source your firewood locally to avoid spreading pests.
What kind of wood should I use?
- Hardwoods (birch, maple): burn hot and long
- Softwoods (pine, spruce): ignite fast
Avoid wood with sap (it pops and smokes) or anything green/freshly cut.
Is it okay to collect wood at my campsite?
It depends where you are. Never cut down live trees, and make sure you check that you are in an area where you are allowed to use fallen material before starting your fire.
Step 2: build the structure
There are lots of options for how to build your campfire but these methods are my favorite.
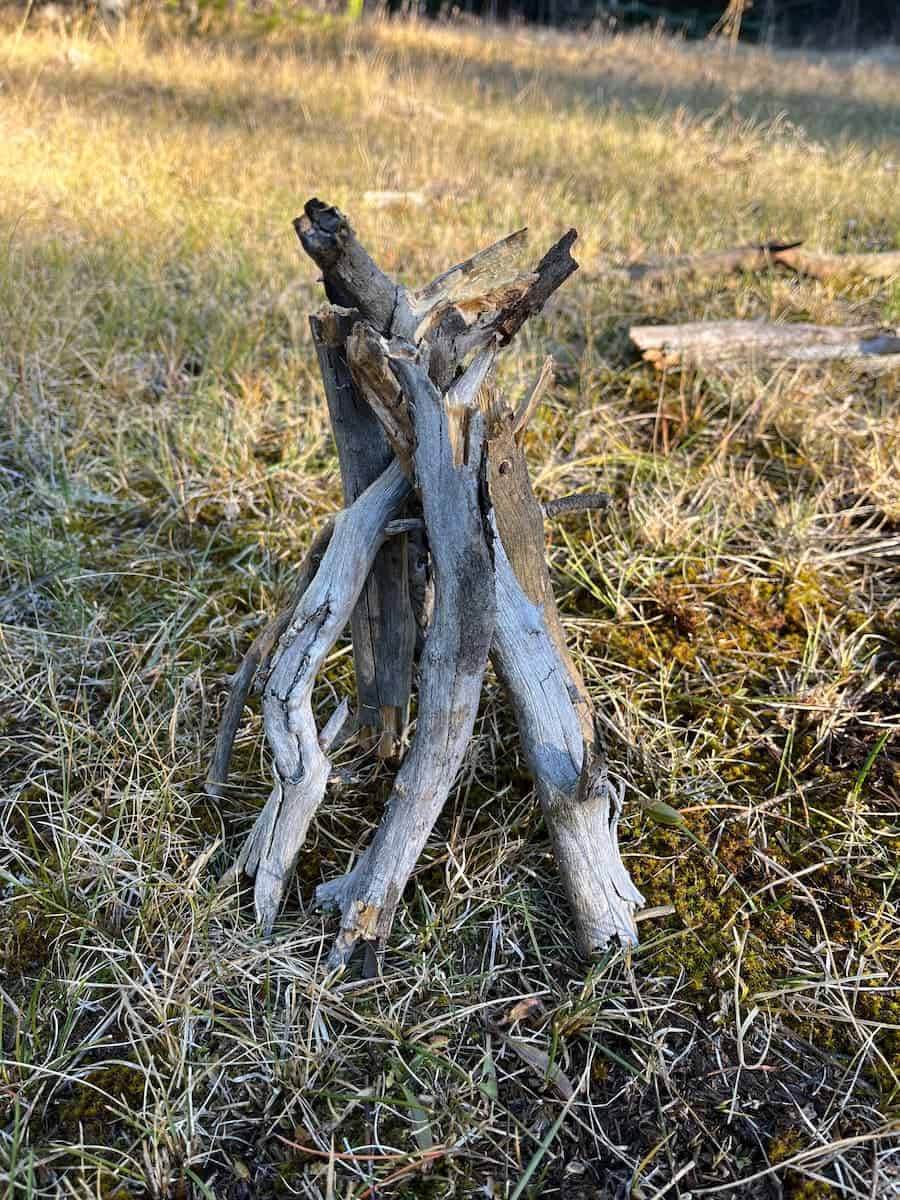
The teepee method. Start with a pile of tinder and begin arranging pieces of kindling in a cone shape around the tinder. Around that, continue to build your teepee by adding a couple bigger pieces of kindling or small pieces of firewood. Don’t build it too tight, as you want lots of air flow. Light the tinder. Once the kindling is lit, you can continue adding pieces of firewood to your teepee.
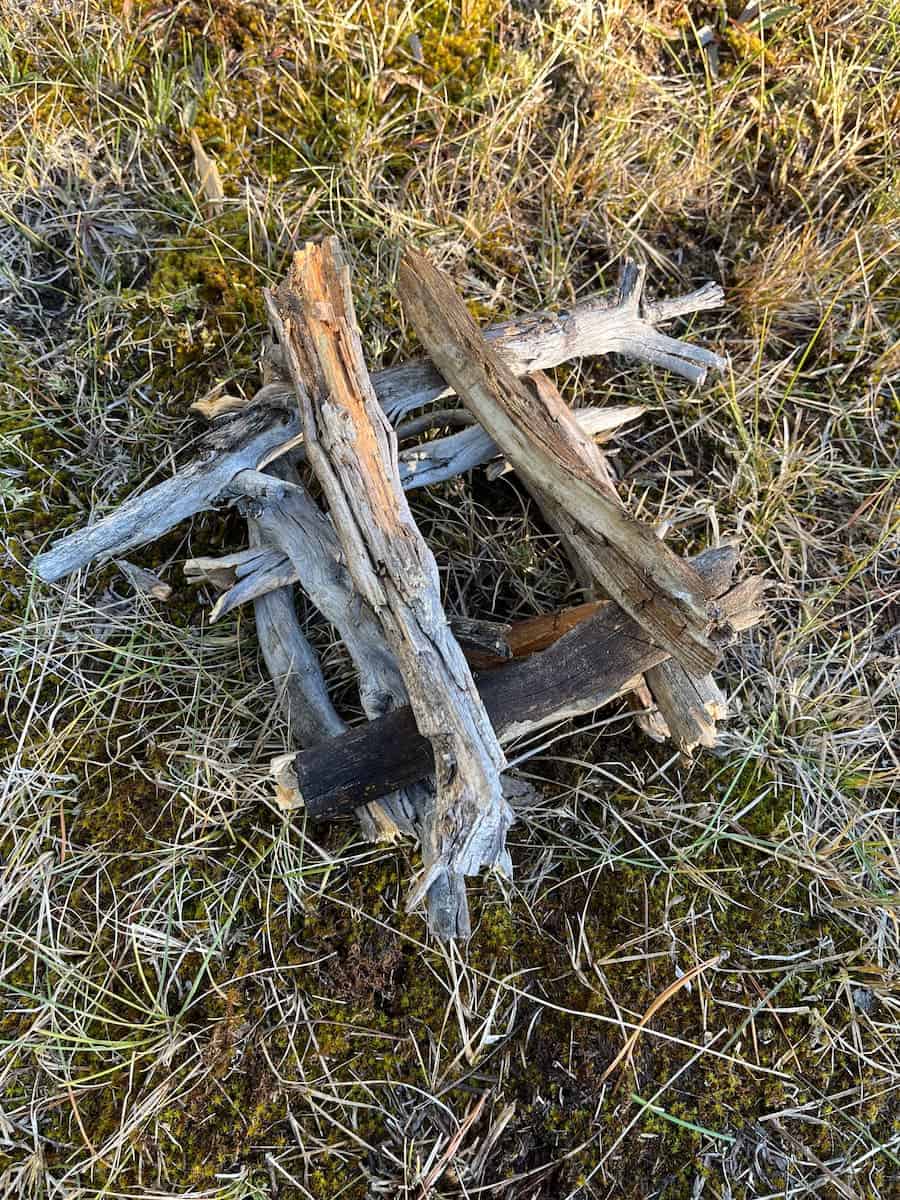
The log cabin method. Place two logs parallel with each other with a pile of tinder in between. Perpendicularly, lay two more logs on top of the first ones so that you create a square around the tinder. Continue alternating the direction of your logs in a crisscross pattern to build your log cabin. Loosely fill the log cabin with kindling and then light the tinder.
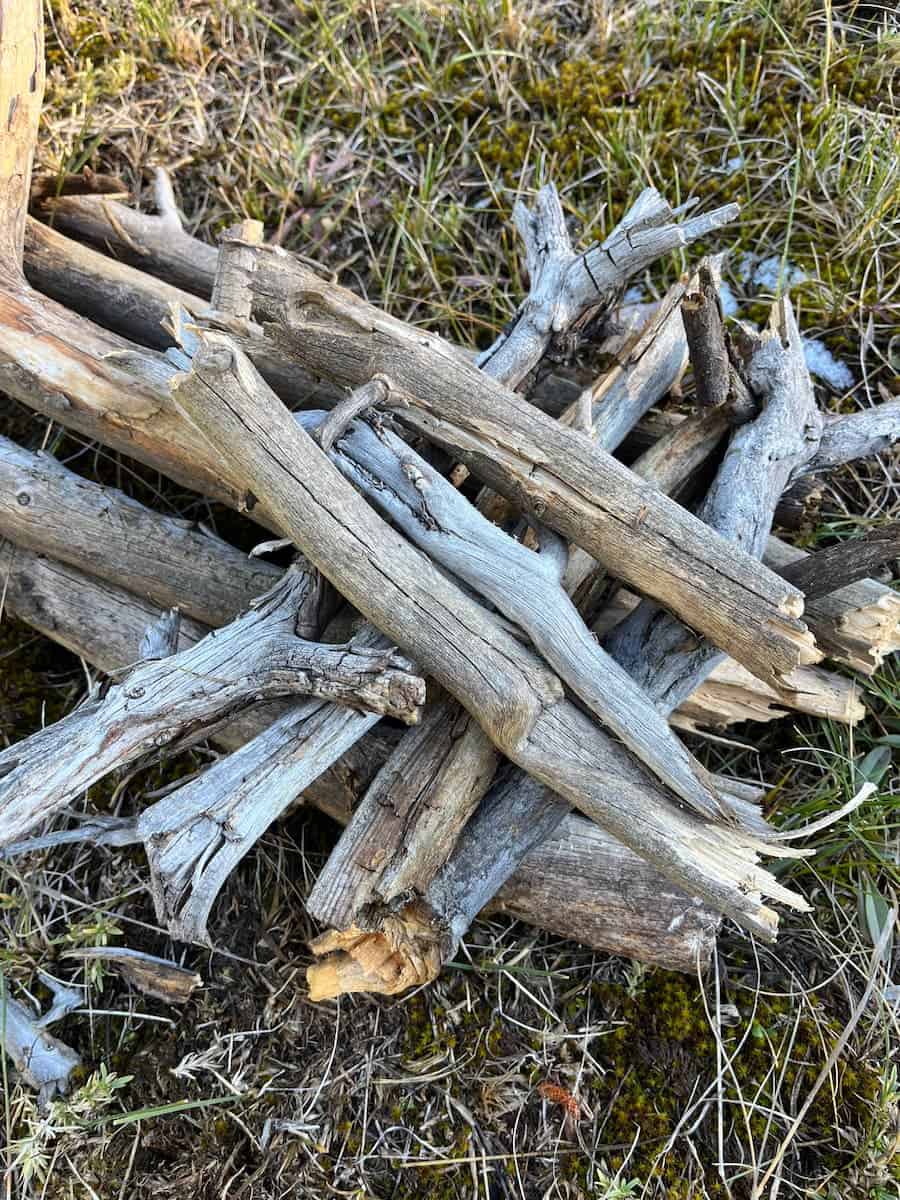
The pyramid method. Take a few large pieces of firewood and loosely arrange them parallel with each other to form the base. Add another layer of slightly smaller logs running the opposite direction (we’re crisscrossing again). Form a pyramid by continuing to crisscross, with the logs getting smaller with each layer. On top of the smallest logs, add the tinder and kindling to the top of the pyramid. Once you light the tinder, the fire will burn downwards.
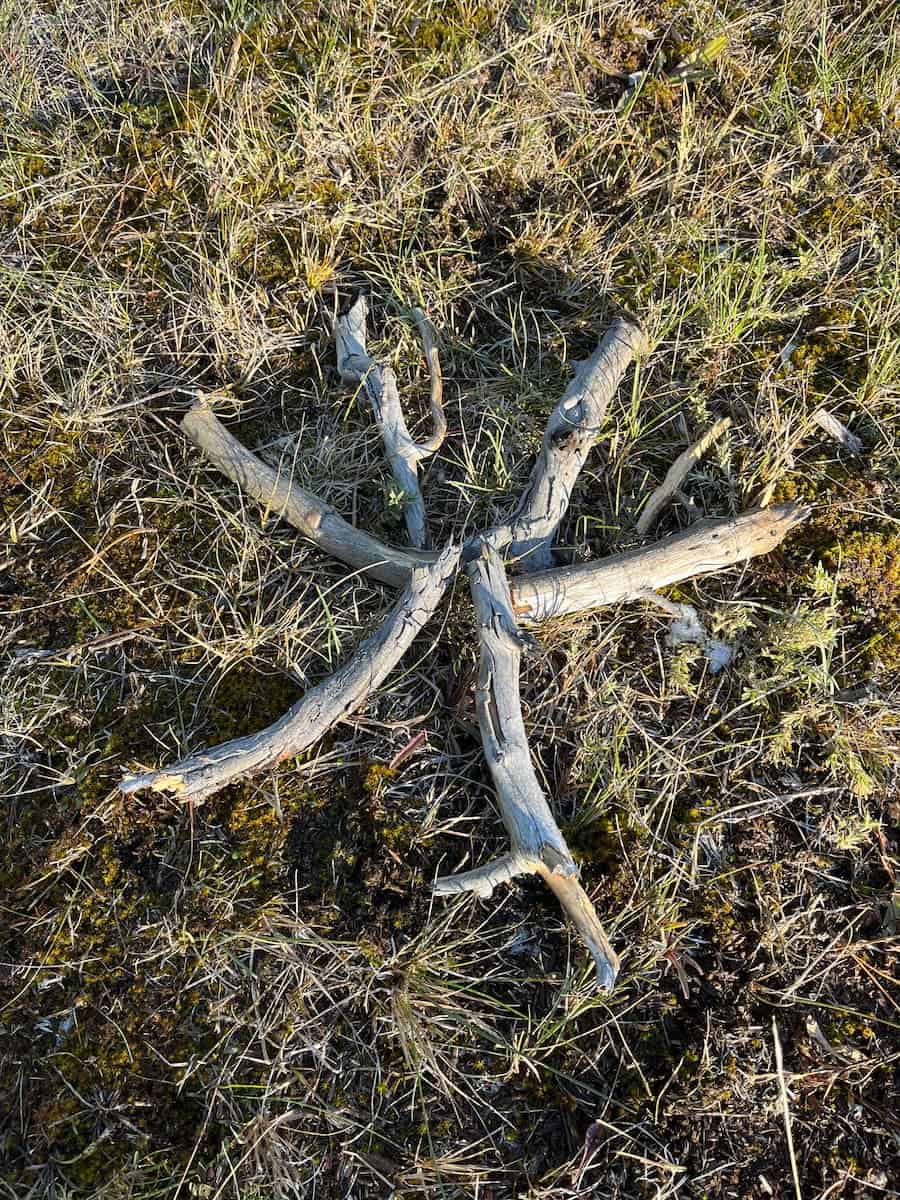
The star method. Use five or six logs and arrange them in a “star” (where the ends meet together in the centre). Where the logs meet in the centre, add a pile of tinder and kindling. Light the tinder. Continue to push the logs towards the centre as the fire burns over time.
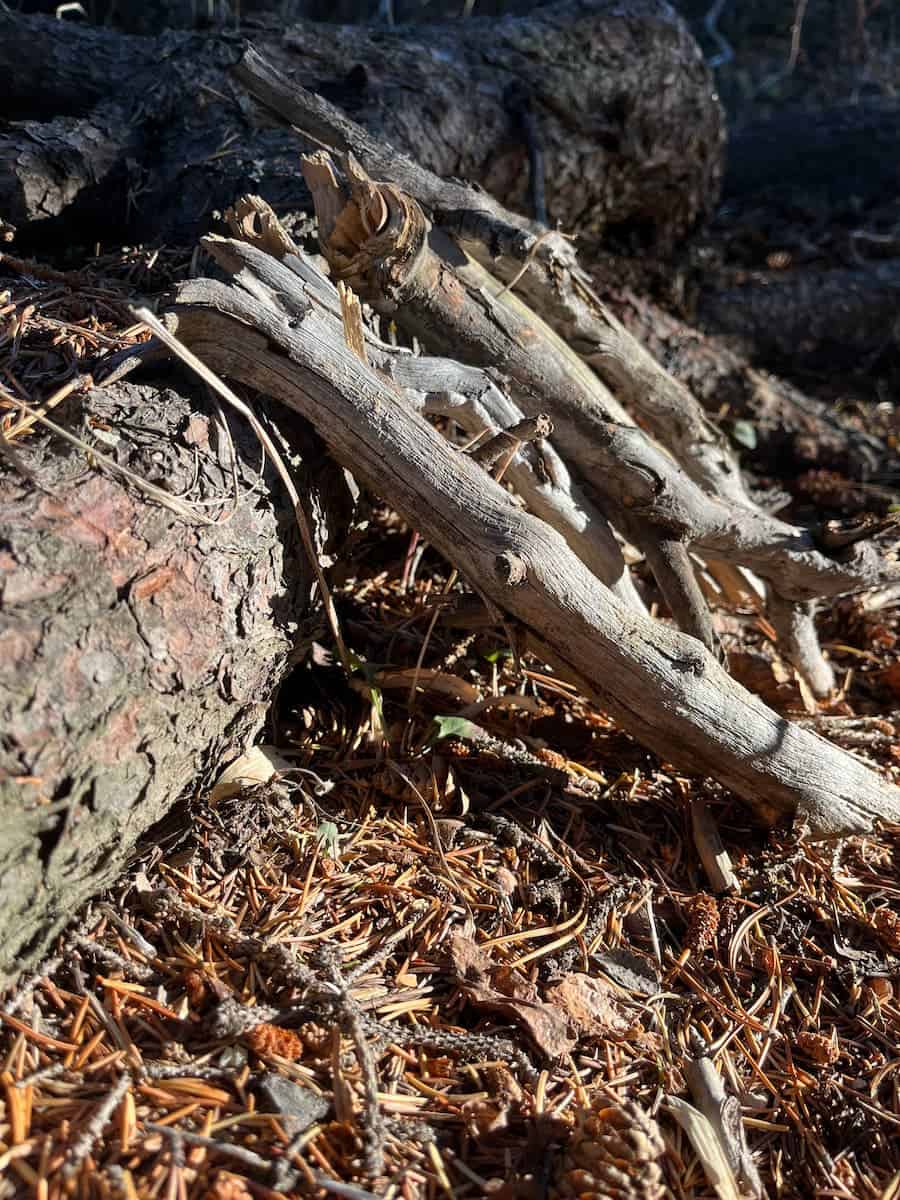
The lean-to method. Lay down a big log and place tinder along one edge of it. Lean the kindling on the big log as though you were building a slanted roof over the tinder. Light the tinder and continue to build the roof by leaning larger pieces of firewood against the big log.
What if the ground is wet?
If the ground is too wet to start a campfire, you can create a fire bed. Lay down dry wood or rocks as a foundation to build your campfire on top of. You might have to scavenge for the dry pieces under the wet pieces on top.
Never assume that rain or snow will put out your fire for you!
Step 3: light the campfire
In my opinion, the best way to start a campfire is using a lighter or matches. Lighters are nice because they usually work when wet. Matches are nice because you can just place the lit match on the tinder.
There are other ways to light a fire too (like using a flint and steel, a ferro rod, a magnifying glass, friction, etc.). If you are counting on having a fire and haven’t tried these methods beforehand, I would suggest that you bring some matches or a lighter as backup. Trust me, these methods are a lot trickier than YouTube makes them look.
Whatever structure you built, it will inevitably collapse inwards. Keep adding wood occasionally to keep the fire going. You don’t want to smother the fire or it will go out, so make sure to add your logs in a way that allows for airflow. Airflow is everything!
Now pull out your pie iron and whip up a treat!
How do I start a fire with wet wood?
- Find and collect as much of the driest materials you can. You’re going to need extra because the wet wood is going to take longer to catch.
- Look for places sheltered by the rain: beneath fallen branches, inside hollow trees, under rocky overhangs
- Whittle sticks and split open larger logs to get to the drier inner wood
- The dead branches that are still attached at the bottom of conifer trees are often surprisingly dry(ish)
- Build your fire structure for maximum airflow — the teepee or lean-to method work the best for this.
- Go slowly through each step. Make sure your kindling is burning strong before trying to add firewood, and make sure you’re starting with your smallest, driest pieces. If you rush it or add pieces that are too big, you’ll smother it.
- If you need to start a campfire in the rain, try your best to block as much of the rain out by using your body, your backpack, a tarp, etc.
Step 4: extinguish the campfire
From 2019 to 2023, 67% of wildfires in Alberta were caused by humans and 33% were caused by lightning. (Even Mother Nature can’t burn things down as fast as we can.) The most important part of starting a campfire is ending the campfire (by ensuring that the fire is totally extinguished at the end).
Douse, stir, douse, touch
First, let your campfire burn down to coals (try to burn the wood completely). Douse the embers. This will make a hissing sound — keep dousing until it stops hissing. Using a stick, stir together the ash and water. Keep dousing and stirring until the everything has cooled down. Your fire isn’t fully out until it’s cool to the touch.
What if I don’t have water?
If you are going to have a fire, you should have water. (Didn’t you check my supply list above??)
But if you find yourself in a situation where you don’t have water, you can use dirt to smother the fire. Scoop a thin layer of dirt over the fire, give it a stir, and then scoop more dirt on top. You don’t want to bury the fire because you might not get the fire out; this heats the ground up and can start more fires. Just keep scooping and stirring until you can touch the coals.
Even when you’re sure it’s out, give it one last check before you leave. Future you (and Alberta’s forests) will thank you.
Campfire troubleshooting
My fire won’t stay lit. You probably need more dry materials and better airflow (more space to breathe).
My fire is just making smoke. You probably have too much moisture and not enough heat.
My fire keeps dying in the wind. You can build a small windbreak. If it is gusting out, then skip the fire.
My fire keeps collapsing. Keep adding new logs and rearranging things so that there is good airflow.
IT’S BLAZING OUT OF CONTROL. Put it out — things can go from bad to worse quicker than you think.
Check out Alberta’s current fire bans
- General: Alberta Fire Bans
- AB Parks: Fire bans in provincial parks
I hope these tips help you stay warm and safe on your next adventure. Want more camping tips, trail stories, and love letters to Alberta’s wilderness? Pull up a log and join the newsletter crew.


